
Ok. I am by no means a recipe blogger. I’m just not. I’m one of those people who will google a recipe halfway through attempting it with no direction whatsoever, who then gets pissed off that a writer has included the entire history of pizza in what is supposed to be a simple how-to.
What can I say? I’m a cut to the chase kind of gal.
Not knowing the history of cinnamon rolls, or why they are so damn addictive, I will keep my story super short.
COVID-19 has me baking a lot. I mean, a crazy amount. I mean yes, gluten-free, vegan stuff has been a bit harder to come by in the stores as we recover from shelves being laid bare in mere seconds by terrified hoards, but I digress.
I was going through Instagram and my friend Denise had posted this insane recipe for her cinnamon twist bread (check out her recipe highlights- it’s there). I was drooling. I had a fairly decent vegan, gluten-free bread recipe that I had tweaked to make my own, and figured I’d kind of mash the two together to see if I could come up with the same result. I wasn’t successful. But who really cares when the result is a gooey mess of cinnamon sugar and doughy goodness?
Not I.
I realized quickly that my ‘1 to 1’ gluten-free flour was going to make things taste great, but it just wasn’t going to rise the same way. So I decided to take its lead, and do a more conventional roll instead.
It was amazing. My family went nuts for it, and I was inundated by DMs asking me for the recipe. But I wanted to make it one more time before I posted it. (I’m totally lying. I just wanted to eat more of it.) It turns out I did add a few things and take a few things away, so I’m glad no post revisions are necessary.
And now, ladies and gents: THE RECIPE.
Drool-worthy, Vegan, Gluten-Free Cinnamon Rolls
Difficulty: Beginner8
servings20
minutes40
minutesIngredients
2 3/4 cups gluten-free flour (I use Bob’s Red Mill 1-to-1)
1/3 cup arrowroot starch
1/3 cup + 2 tbsp coconut sugar (cane sugar, or brown sugar works)
1 tsp sea salt
1 tbsp psyllium husk
1 tbsp cinnamon
2 cups warm water
8 g or 2 1/4 tsp dry active yeast (or quick rise) (1 package)
2 tbsp oil (light flavour like melted coconut, or avocado)
- For Filling
1 cup coconut sugar
1/2 cup vegan butter (I have used Earth’s Own salted and it works great too)
3 tbsp cinnamon
Directions
- Prepare 9″ spring form / quick release cake pan with parchment paper.
- In medium bowl, whisk together warm (100F) water, 2 tbsp of sugar, and yeast. Allow to sit for 5-10 minutes to proof. (It gets frothy!)
- While yeast is proofing, sift together the dry ingredients – flour, salt, psyllium husk, the rest of the sugar, and cinnamon – and make the filling.
- For the filling: melt the butter, and mix in the sugar and cinnamon until you have a creamy, smooth mixture. Set aside.
- When yeast is ready, add 2 tbsp oil to it, and then add to the flour mixture. Mix well until all the ingredients are well incorporated, and then kneed the dough for about 3 mins.

- Let ball of dough sit in a bowl, covered with a dish towel in a warm place for about an hour. When you come back to unveil your creation, preheat the oven to 350 F. I also place a 9 x 13 pan filled 1/3 of the way with water in the bottom shelf of the stove to act as a water bath.
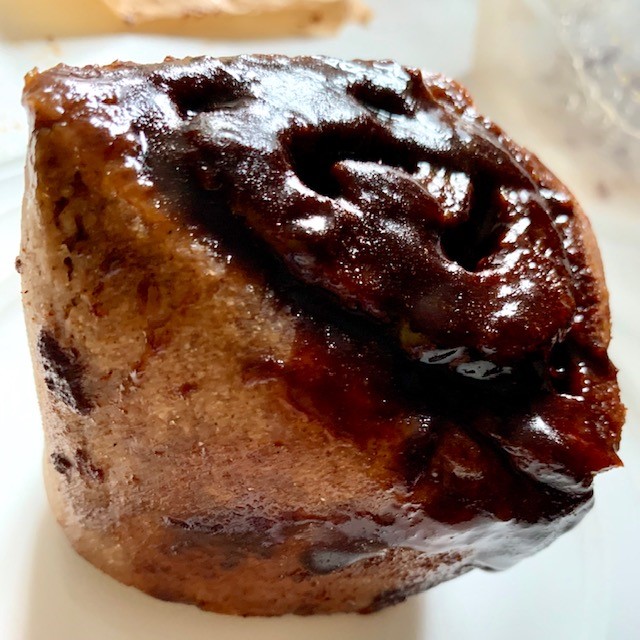
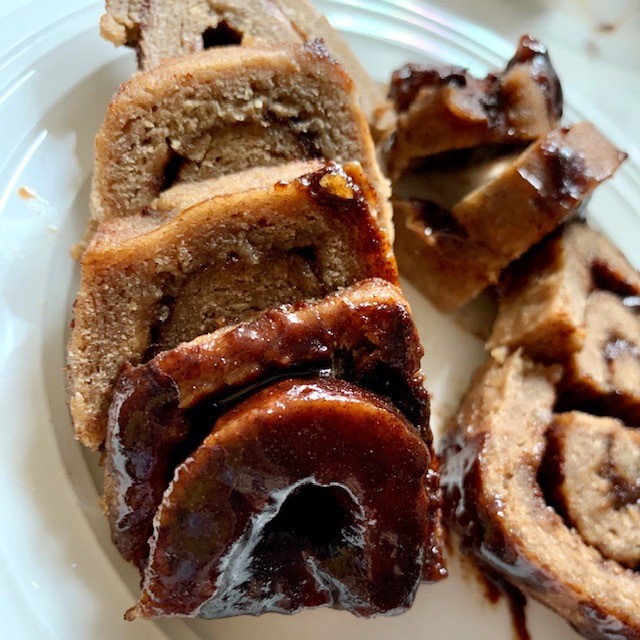
- Roll out the risen dough into a thin (don’t go thinner than .25″) rectangle, and spread the filling over the whole area. If you can save a couple teaspoons worth, I like to spread it on the top of the hot rolls when they come out. YUM.
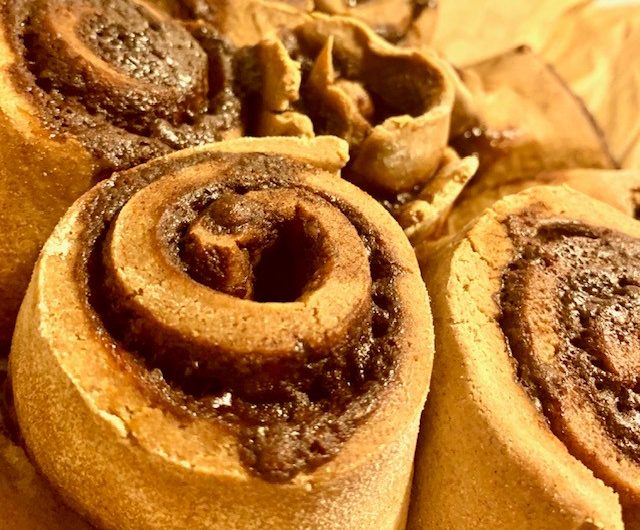
- Start rolling up, from the short end of the dough. When you’re done you should have something that looks like a log.
- Cut the log in half, and then cut those 2 halves into 4 equal parts, so you have 8 mini rolls. Then place the rolls with the pretty swirly side facing up in the cake pan. This pic is from my first attempt, but it gives you a general idea.

- Pop it into the oven for 35 – 45 mins. Mine were perfect at 40 mins.
- When they come out, spread that last little bit of filling over the top of your rolls. Wait for them to cool slightly (if you can), and then serve to the drooling family that has congregated in your kitchen because it smells so freaking good.

- Repeat as needed.
Notes
- You can totally use quick rise yeast with this, just add the extra sugar to the dry mixture with the yeast, and then add the 2 cups of water.
- These heat up BEAUTIFULLY in the microwave for 20-30 seconds. Or, slice them up for smaller portioned treats and then zap them for some extra warm gooey-ness.

No Comments